Migrate Citrix OrgID to new OrgID

Citrix Cloud to Citrix Cloud migration guide, plus some general thoughts
- License policy change
- Services in use
- Prereqs
- Migration
- WEM Service migration
- FAS Service migration
- Connect Azure AD to Citrix Cloud
- Conclusion
License policy change
Citrix changed their license policy regarding when customers want to decrease the number of licenses they have. As a result, if a customer, for various reasons, reduces their staff, they need to migrate to a new Citrix OrgID and purchase a new license.
Update pr. 28/12
You don’t need to migrate from one OrgID to another OrgID, when decreasing license count, but … you can’t decrease your number of licenses, if you keep using the same OrgID. If you have bought a 1000 licenses, you can’t decrease to e.g. 500. You still need to pay for 1000, but can assign 500 licenses, if that’s what you need.
Services in use
Citrix DaaS
Citrix FAS
Citrix WEM
Azure Active Directory
Prereqs
Prereqs
├── Citrix
│   ├── Full Administrator in both Citrix Cloud accounts
│   ├── Automated Configuration Tool(ACT)
│   ├── Two new VMs for Cloud Connectors
│   └── Two Secret Clients, one in each Cloud account
└── Azure
    ├── Global Administrator in Azure
    └── SecretID password of the service principal in Azure
Migration
Resource Location
From one of the new Cloud Connector VMs, connect to the new Citrix Cloud and create a new Resource Location. It’s preferable to use the same name as in the existing Citrix Cloud. More on that later.
Cloud Connector and Automated Configuration Tool
After the Resource Location has been created, download and install Cloud Connectors. While they is installing, download ACT(Automated Configuration Tool).
Install ACT. That will create a shortcut on the desktop icon named “Auto Config”.
When executing “Auto Config”, a PoSH window will open
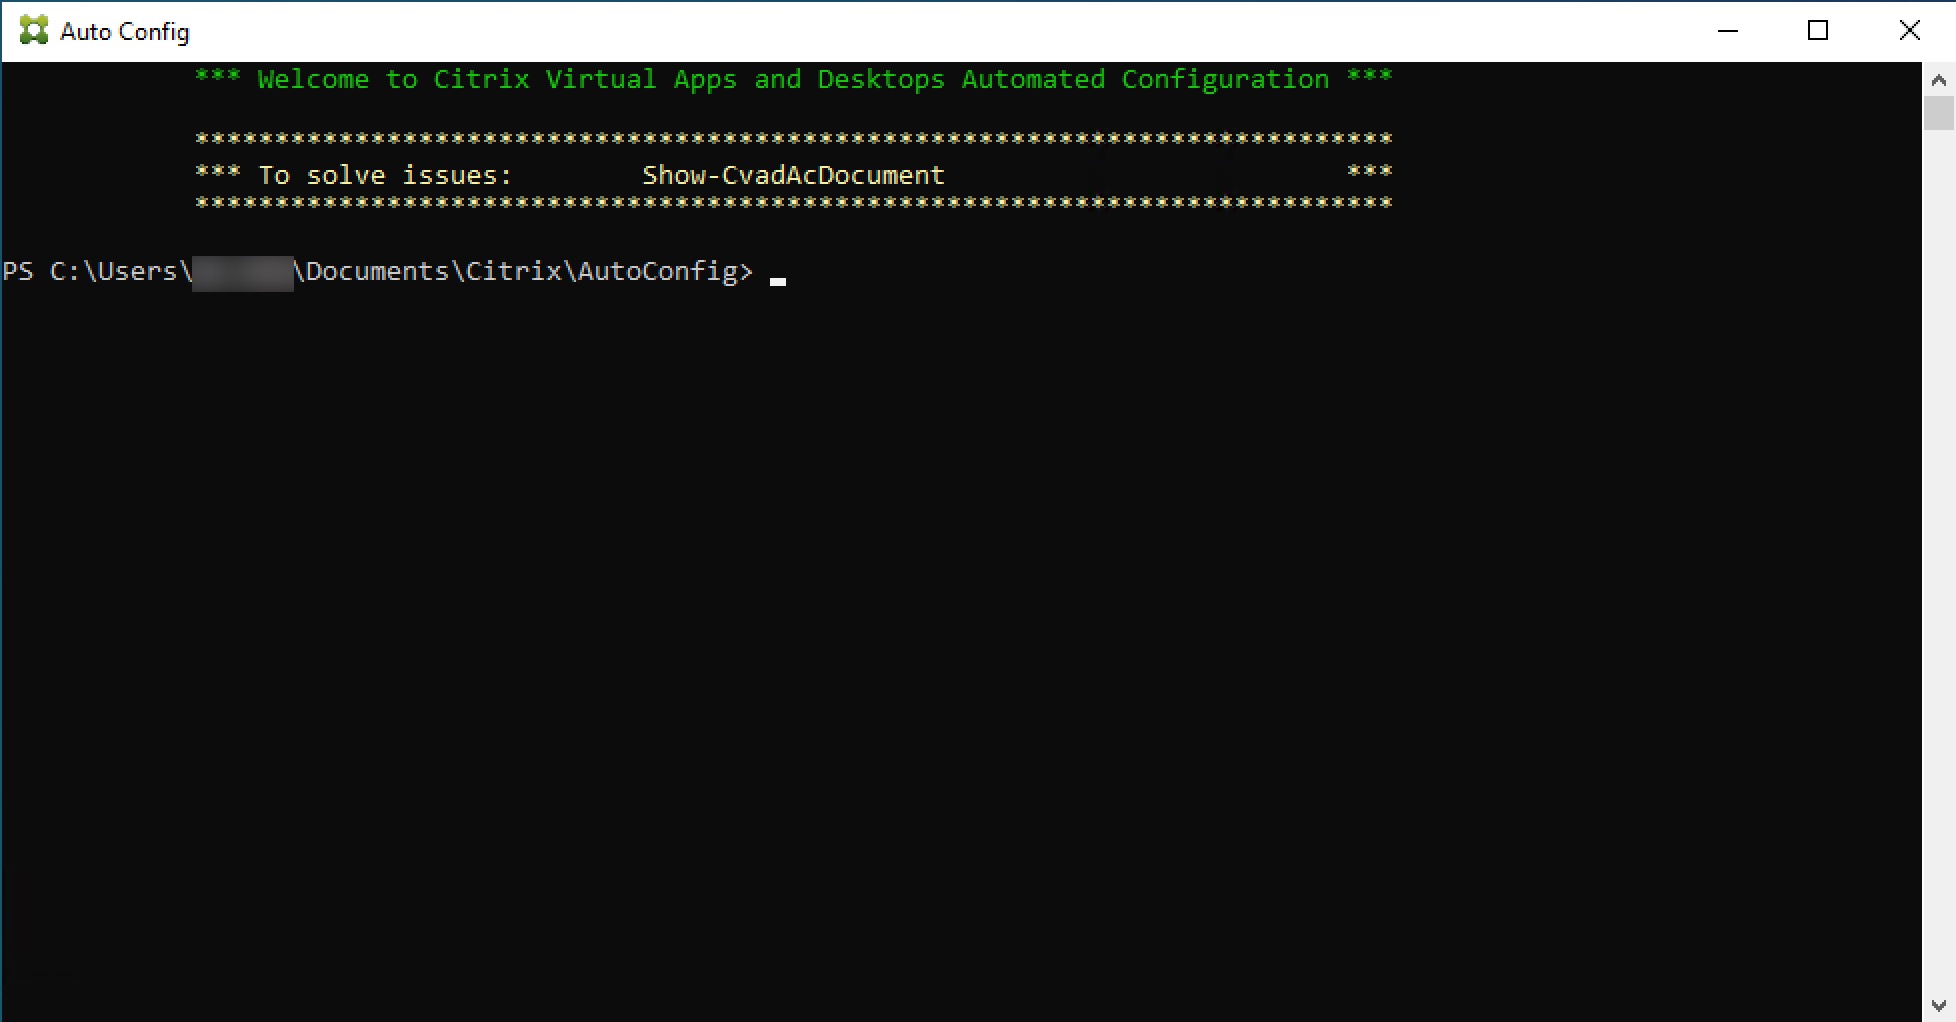
Insert values from CustomerID and Secret Client, to the cmdlet below and execute it
Backup-CvadAcToFile -All -CustomerId "CustomerID taken from Citrix Cloud" -ClientId "ClientID from Secret Client" -Secret "Secret from Secret Client"
This creates a folder structure in the “\AutoConfig\” folder.
.
└── ./AutoConfig
    ├── ./AutoConfig/Backup_date_and_timestamp
    ├── ./AutoConfig/CustomerInfo.yml
    ├── ./AutoConfig/CvadAcSecurity.yml
    └── ./AutoConfig/ZoneMapping.yml
And an outout that looks something like this:

CustomerInfo.yml needs to populated with CustomerID, ClientID and Secret from Secret Client from the new Cloud account
Set-CvadAcCustomerInfoFile -CustomerId "CustomerID taken from Citrix Cloud" -ClientId "ClientID from Secret Client" -Secret "Secret from Secret Client"
CvadAcSecurity.yml needs hypervisor information, which is typed in manually.
If Resource Location was named the same, then ZoneMapping.yml doesn’t need any configuration.
Inside ./AutoConfig/Backup_date_and_timestamp, there are several .yml files that can be invoked using ‘Restore-CvadAcToSite’ with options like ‘-GroupPolicy’. This will recreate all the Citrix Policies that were exported when using ‘Backup-CvadAcToFile’.
There is a chance that this might cause issues where the policies are assigned. The first time I attempted this, I used ‘Restore-CvadAcToSite -Restorefolder
' and encountered a bunch of errors, as Machine Catalog, Delivery Group, and so on are dependent on each other.
Before we move forward, a short warning: MCS-created Machine Catalogs cannot be migrated. Whether the hosting connection is created before running Restore-CvadAcToSite doesn’t matter.
Citrix has created a migration order
I had the misfortune of not saving my Service Principal password when I last created the Enterprise App for the Hosting Connection. 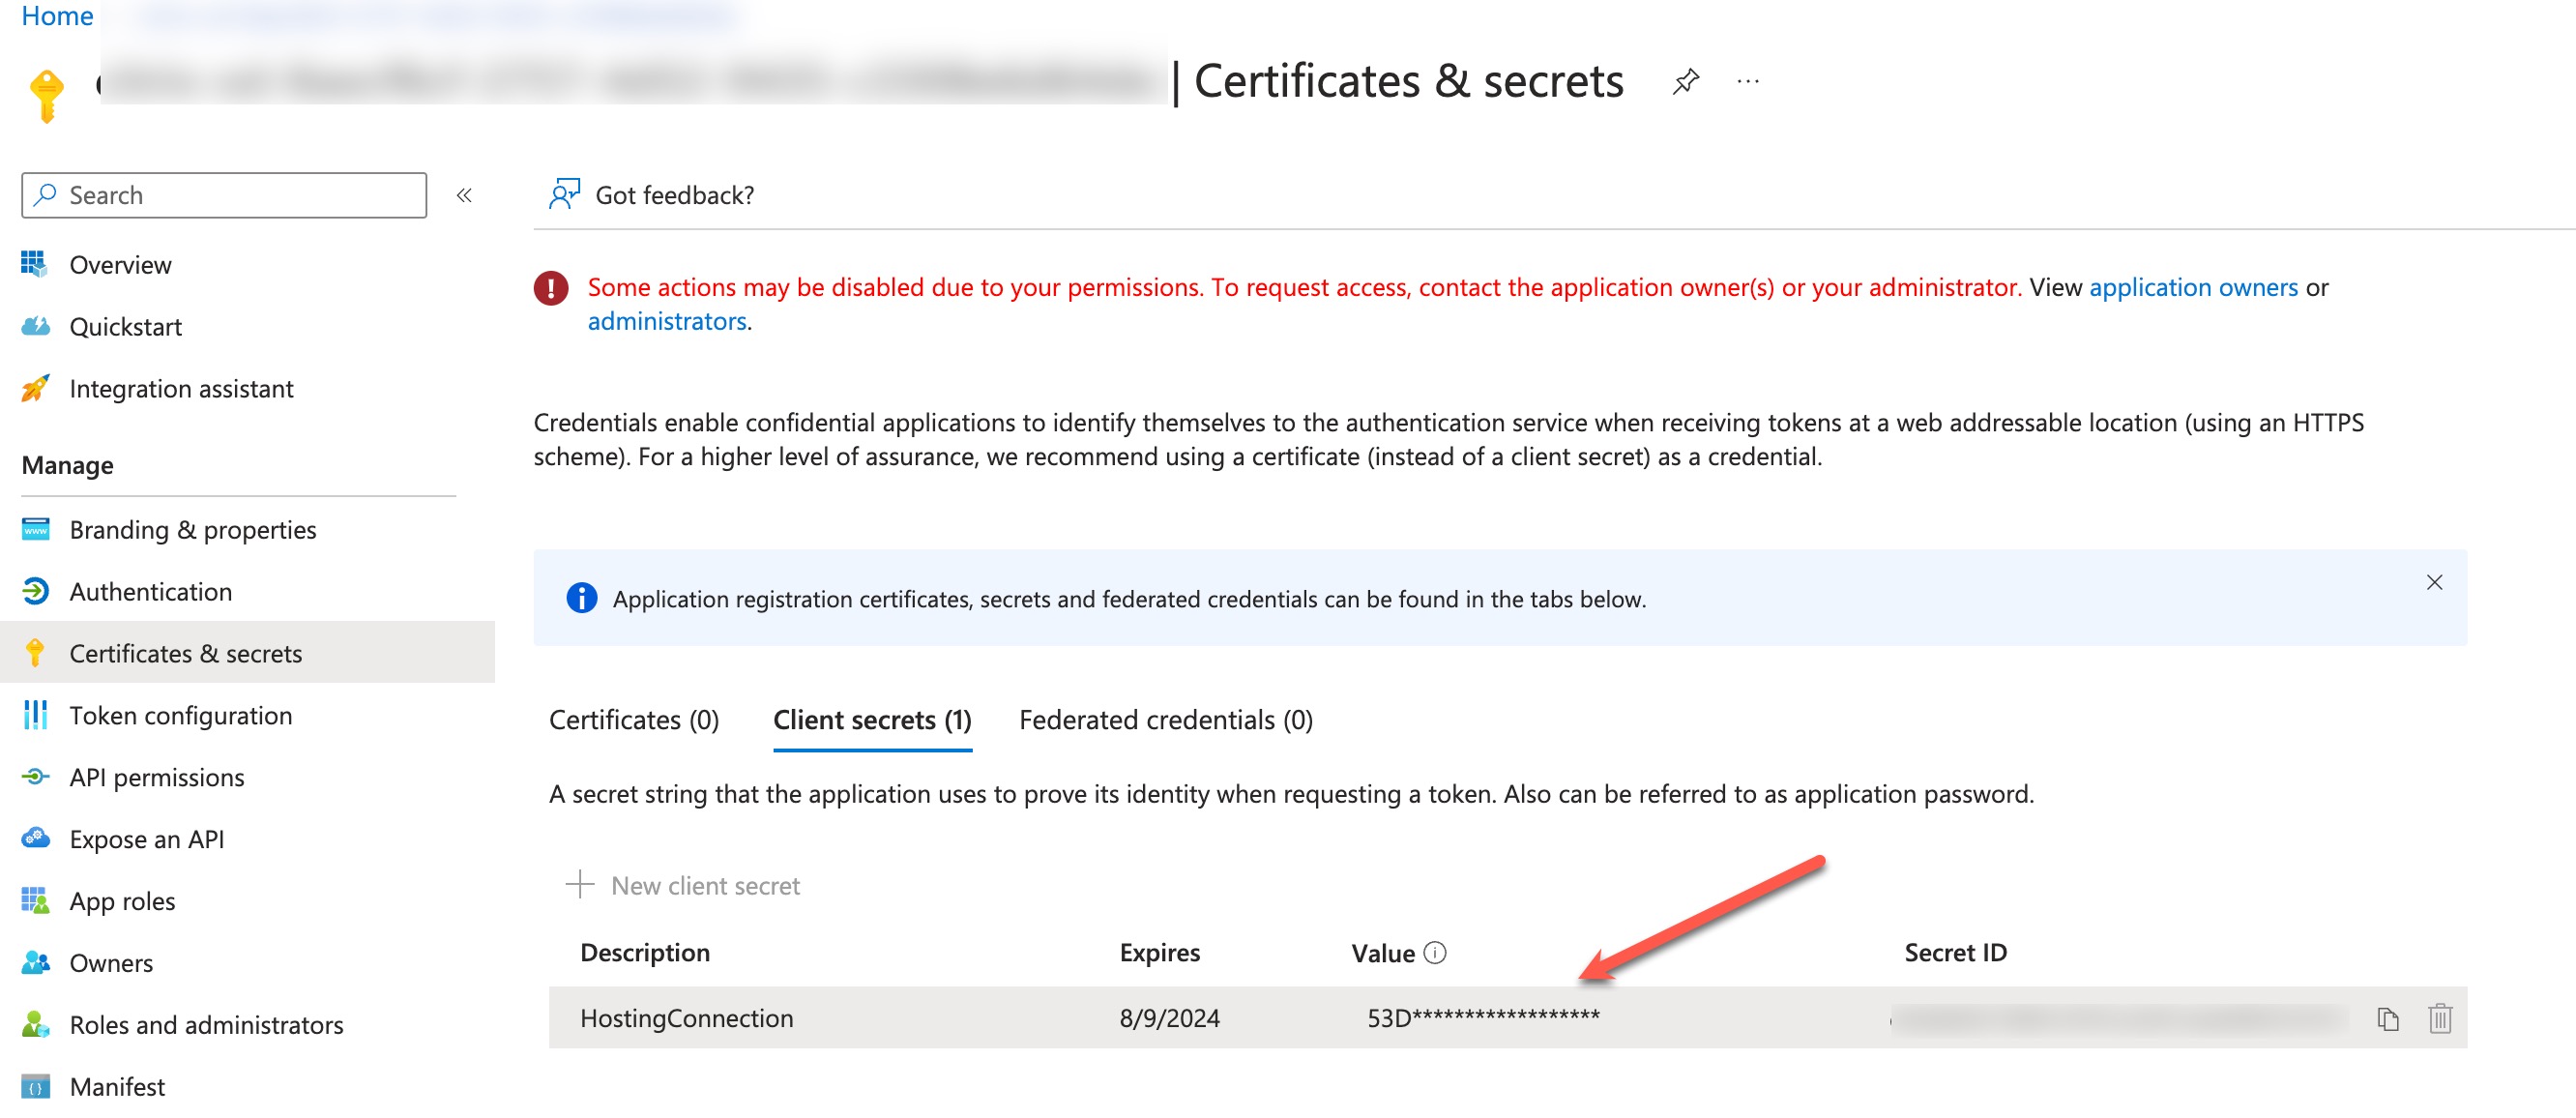 I had to create a new Client Secret in Azure and manually create the Hosting Connection.
Machine Catalogs needed to be manually created, again with the same name as the existing, as they are MCS-created. For PVS-created Machine Catalogs use the code block below.
Restore-CvadAcToSite -MachineCatalogs -RestoreFolder <path>
Move forward in the migration order
WEM Service migration
That was actually fairly easy, when I found the option. Thank Yan Wang, from the WEM team for pointing that out.
Start by provisioning the WEM Service.
In the existing WebConsole go to Configuration Sets and create a backup in “Backup and Restore” and download it.

When the provisioning has completed, go to WebConsole. Add a new Configuration Set.
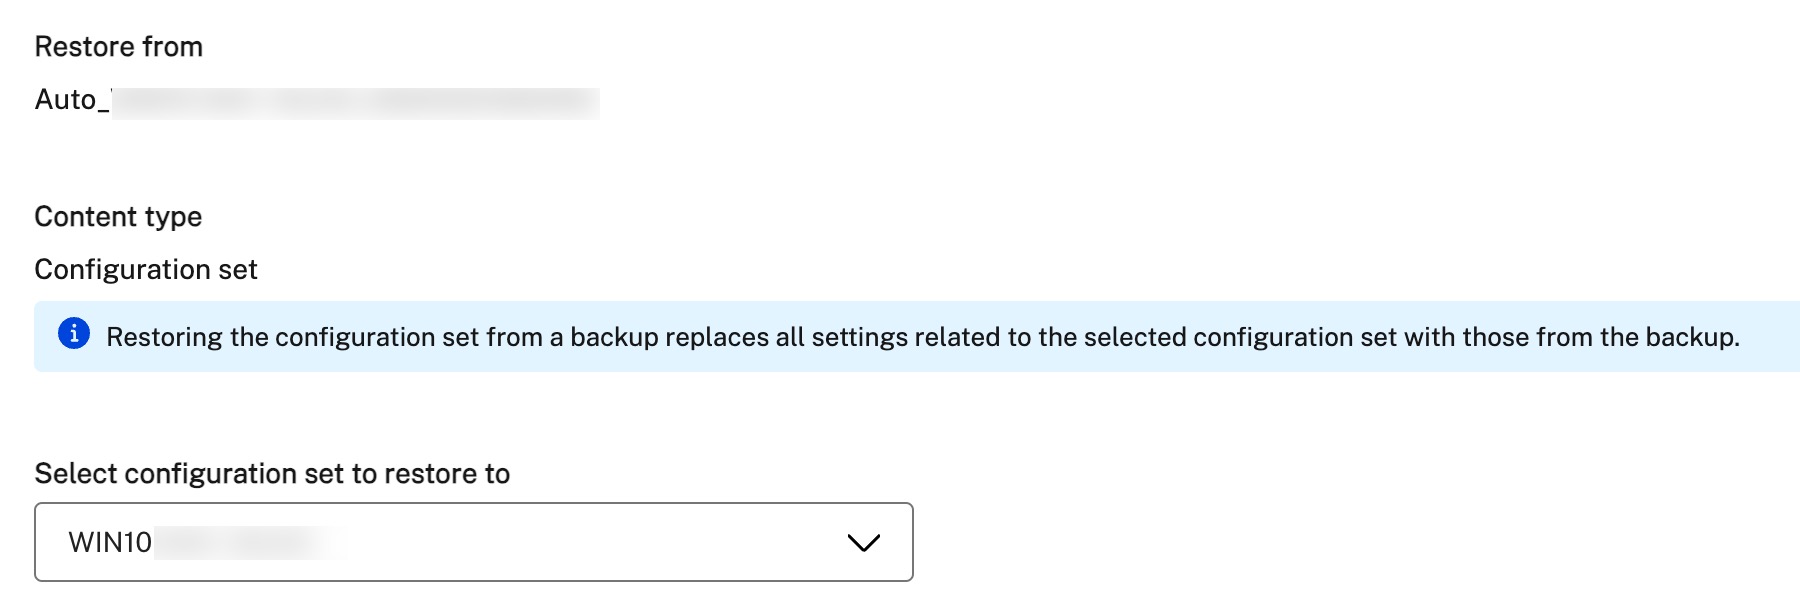
Press Configuration Sets(the briefcase icon), go to “Backup and Restore” and upload the resently downloaded configuration set. Press the “Restore” button, as seen below.

Select the newly added Configuration Set, in the dropdown and press “Restore”.
 If you have more than one Configuration Set, then …
FAS Service migration
It’s possible to reuse the FAS servers from the existing environment.
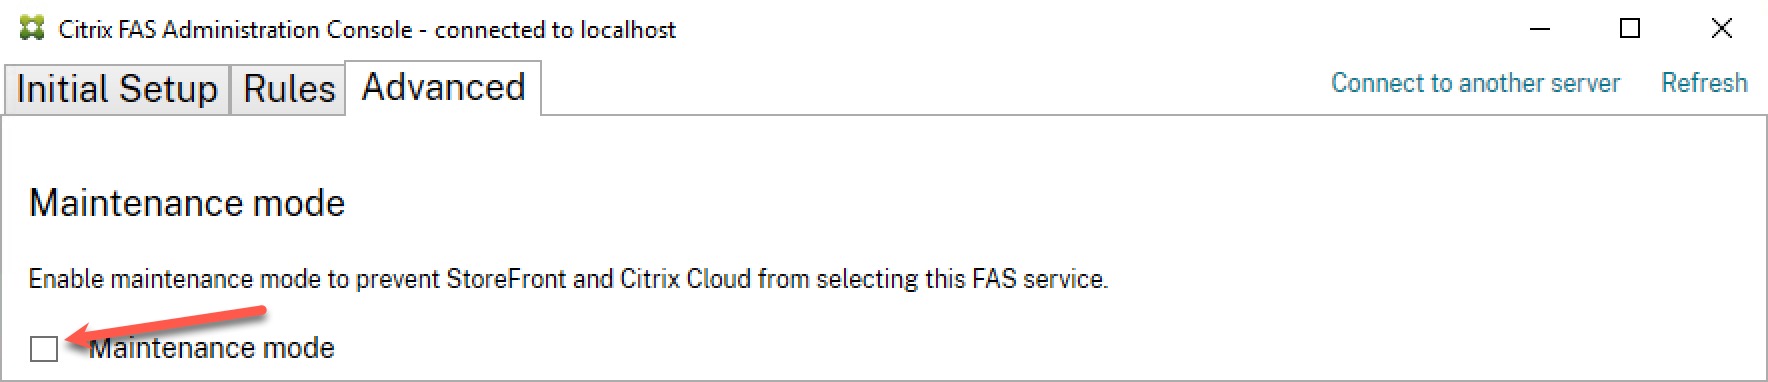
Set one of the FAS servers in maintenance mode.
Disconnect from Citrix Cloud in Citrix FAS Administration Console. Connect to the new Citrix Cloud

Enable FAS in Workspace Configuration

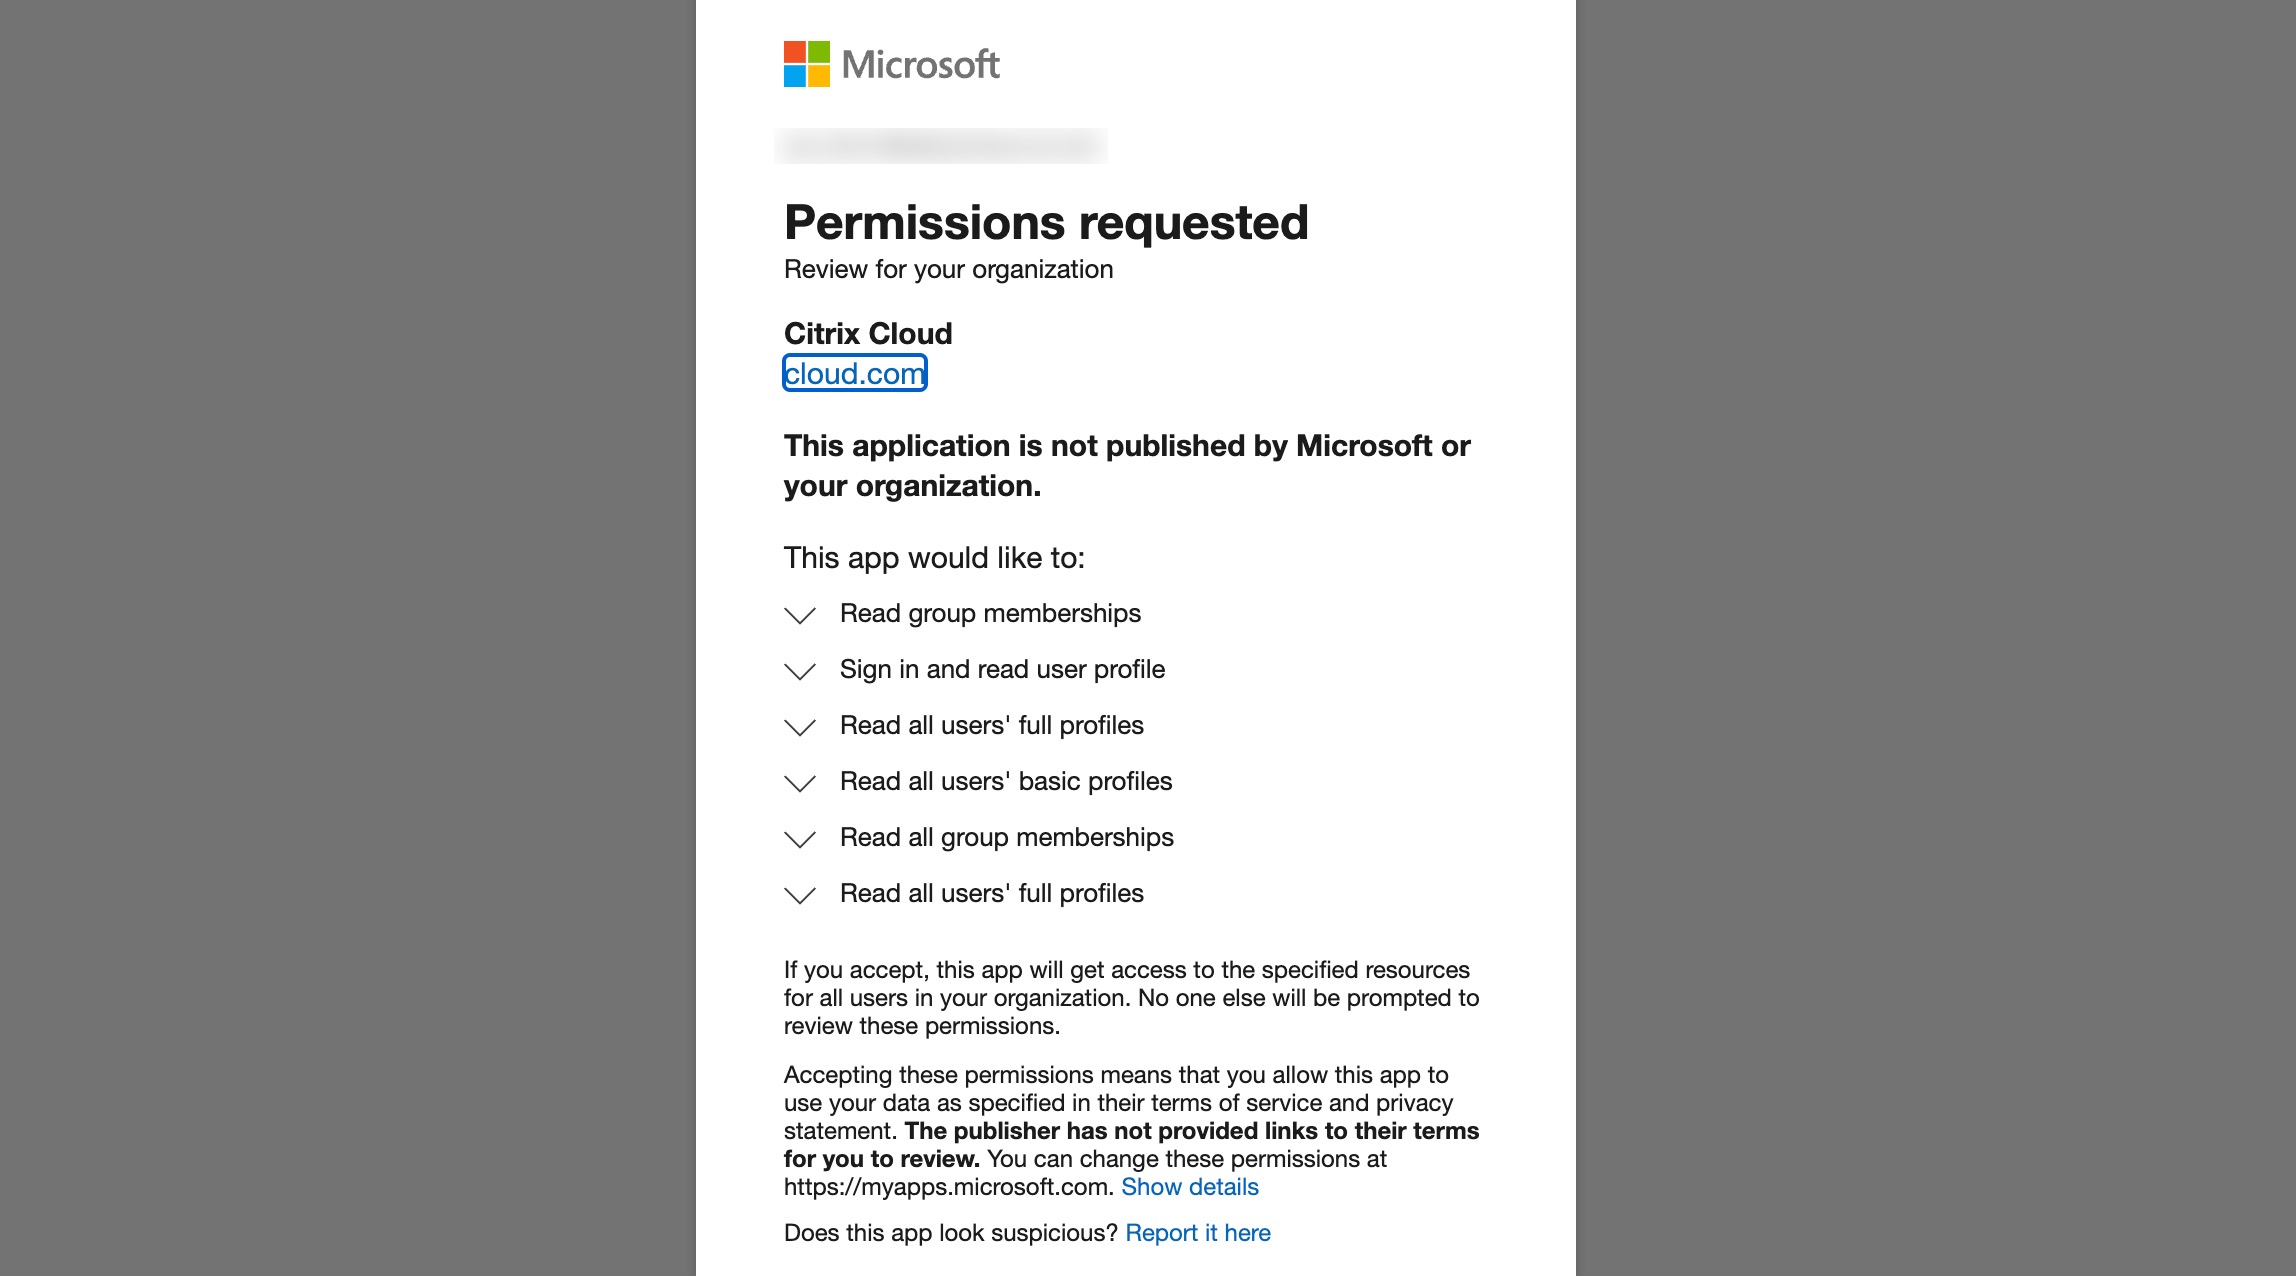
Connect Azure AD to Citrix Cloud
Connect to Azure from “Identity and Access Management” in Citrix Cloud, using a Global Admin account.

Write a sign-in URL and press “Confirm”.

This will open a browser. Log in with a Global Admin and accept the required permissions.
Conclusion
In my opinion, changing the policy on such a simple task is a significant step in the wrong direction and a waste of customers’ money. Changing from one OrgID to another is by no means a small change for any customer who encounters this. It would have been a slight change if customers were still using on-premise only and reporting via Call Home. I have never seen how Citrix handles license amounts or license choices, but I imagine a dropdown with license types and a field for the license amount.
That’s my two cents. I hope you enjoy the blog/guide. Feel free to let me know if you come across any flaws or suggestions for improvement.